Wednesday, December 28, 2011

Making a plan for sending cards for a year

I haven't bought a greeting card in almost 5 years! I have loved sending something made by me that means so much more. Unfortunately, like many of us, I have the challenge of getting my cards made and actually sent to the recipient in a timely manner.  Ooops, there goes another belated birthday card was said way too often this last year. So, I am prepping things ahead of time. Thanks to my sister-in-laws gift of a calender for 2012 with all the birthdays in the family on it. All I have to do is add my husband's side of the family and than I will get the envelopes all addressed and put them in order of when they need to be sent and put them in a basket with my book of stamps and pen ready.  The other side of it is actually making the cards.  So I created two cards that could be used for birthdays or any other kind of celebration that will be availalbe to make at the next Project Playground on January 29th.
I was playing around with a window card I created using the Art Philosopy cartridge which hasn't come out of my machine for any other Cricut cartridge since I got it in October. I love all the options that can be used for both scrapbooking and cardmaking.  I created this window card with Rectangle #8 and some cut out stars. There's a star adhered with foam tape on the inside that shows through the window but I made it a suprise and put the sentiment strip over it so when you open it you get this...

I added the sentiment "happy birthday" with the Classmate Alphabet stamp set but you could add any type of sentiment like "celebrate" or "congratualtions". Than I created this easy card using the November stamp of the month Cherish the Day. Although, it's no longer stamp of the month you can still get this stamp set and utilize it throughout your year.
Now, that I have a couple of masculine cards for those male birthdays coming up in the first few months of 2012; it's time to get back to the girls... I got the new catalog and am SO in love with the new paper sets! Can't wait for payday so I can get some ordered and start creating with the new stuff!

Monday, December 12, 2011

Thank you card gift packs

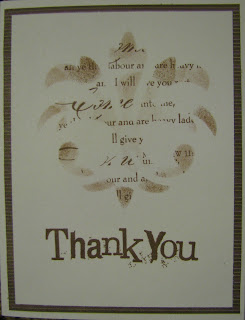
Thanks to Lisa Stenz for the idea on creating a stencil with the Art Philosophy Cartridge. It's a technique I have used before but it was a very good reminder and got my creative juices going. I cut out a heart, snowflake, star, flower, ornament, tree and fluer di lis accent and used my newest stamp sets Cherish the Day, Everlasting Life, Hooray Bouquet and a tried and true favorite of mine, A Little Thanks.
I just used the coordinating color cardstock and inks in these two thank you cards.
Than, I deviated and made some Christmas Cards using an ornament and Christmas Tree and paper from Believe paper pack.

I sponged in ink color over the stamped words with sponge daubers. I added a second color to these Christmas cards to make them extra special and added Glitz Glitter Gel in very small amounts that I spread around with the tip of the bottle.
Than, I started thinking about the next Project Playground in January and decided to make a birthday card.

I was using a block that was a little too big for the stamp I was using so the ink got on the edge of the block and made a line. Well, I decided to make some more of those lines in various directions which gave a neat distressed background effect. I used the Wonderland Paper pack paper with this card.

Next, I went into my browns:

 I was wishing for more vibrant color inks and papers at this point so those are now on my wish list. So, I went back to making Thank you cards with the Fluer di Lis accent.

I made over 60 cards! To make a set of six you will need: 1 12 x12 sheet of paper for your colored background which is cut at 4 x 5.25" and white card stock cut at 3.75 x 5" and of course a template cut out of scrap card stock and the coordinating ink colors. The possibilities are endless and easy with this technique. I can't wait to get more ink colors and papers to play around with this.

Monday, December 5, 2011

December Close to My Heart Constant Campaign Special


When you place a minimum order of $25 from the Autumn/Winter 2011 Idea Book, you can get two valuable new products for just $15: the My Creations® Collage Cubes (a Spring/Summer 2012 sneak-peek product!) and the exclusive My Acrylix® Rock the Block E-size stamp set (available only during this promotion). This Rock the Block promotion represents a retail savings of almost $30! You're going to love the collage cubes and the Rock the Block stamp set, which work together for interactive, fashionable fun!


Dates: Offer valid December 19, 2011–January 31, 2012.

Sunday, December 4, 2011

Believe Christmas Card Kits

Want to send some special Christmas cards? Truly the homemade cards make the most impression and many of them are kept because they are so special to the recipient.  I have a few cards I have kept from my customers that have really meant a lot!  Here's a photo of Series 1 of the cards from the Believe paper pack. It's 10 of the 30 cards I made from the paper pack.  You can get all 30 cards for $45 or you can get just one of the Series with 10 cards for $18. The kits include all pre-cut paper, stamped images, embellishments, envelopes and easy instructions with visual. It will take you about an hour to assemble!  All you need is some adhesive you can pick up at Wal-mart! You can add a bottle of Glitz Glitter Gel to add the extra sparkle for just $4 extra. Or you can come this weekend to my final workshop on Sunday 1-4pm and make in the company of other wonderful women and pay only $15. 


RobertsonOasisAngel@gmail.com          Merry Christmas!

Monday, November 28, 2011

Love Alphabet Stamps!

I created this page using several alphabet sets and coordinating ink colors to create the word block that says "salt" and "light". This page was designed in memory of my Uncle Garrett who recently passed away. I really love the versatility of alphabet sets.  I think that more fun can be had with them and I will let you in on what I create with them in the future.
Close to My Heart products used: Trinity and Classmate Alphabet stamp sets, Elemental paper duo, dimensional shape, Cricut Art Philosophy Cartridge

Thursday, November 24, 2011

Thanksgiving Blessings

Studio J is my best friend! I simply love the ability to create a 2 page layout in less than 30 minutes and buy the jpeg image for $3 so I can share it within minutes after I download it from my inbox. I created this layout on Monday morning before heading to my day job and finished it up with the journaling that evening. I am going to print this out as 6 x 6 size and put them together and have them framed for my sister-in-law and her family who were one of the stars in this layout.


 I will post the framed version once I get that done. Michaels and Hobby Lobby have all kinds of sales going on this weekend so I am sure I will get a deal on framing. I wish you all a very blessed Thanksgiving!  If you have the desire to deepen your relationship with God, I would love to suggest to you to use scrapbooking as a means to growing in your relationship with the Lord.  I have a new blog for my new faithbooking ministry called Faith to Life Connections. Please visit and follow me there for inspiration on scrapbooking your faith.  Faith to Life Connections

Wednesday, November 9, 2011

Believe Christmas Card Kits

Beleive Christmas Card Kits are all ready for you to just put together.  All kits are with pre-cut paper, stamped images, embellishments and envelopes.  All you need is the adhesive and a little bit of time to relax and paste. Kits are for 30 cards using 10 designs. Cost is $30 plus shipping if you are not nearby. Please let me know before November 31st if you would like to order a Believe Christmas Card Kit.  Contact me at RobertsonOasisAngel@gmail.com for orders or info. Here are some of the samples. I am working on the last series of 10 and will get them into a slideshow as soon as possible.


Tuesday, November 8, 2011

Christmas Card Stamp Camp Sneak Peak

I was so proud of myself for having my workshop figured out until my bulk order came and I discovered it wasn't what I expected so I had to re-think my Christmas Card workshop.  Funny how in the midst of the crisis I was ranting at myself for not asking first before buying but now after working it all out, it will end up being a much better thing.  I had to, of course, put together more samples since I will be using all of the papers in the Believe paper pack but I am so pleasantly surprised by how wonderful the newest samples are coming out.

I am using the same designs just changed the ink color on some and a stamp or two here or there for variety. I will be preparing kits for anyone that can't make a workshop but would love to put together some fabulous cards. Stay tuned for more details on kits...

Cherish Family Workshop Coming up...

Doing my first Cherish Family Workshop for my dear friend Shelly at her place this Saturday and wanted to share some of the layouts and paper choices ahead of time for anyone contemplating coming. If you don't know Shelly and weren't invited, No worries, I have the same workshop schedule twice at my studio on Monday evening November 21st at 7pm or on Saturday afternoon December 10th 1pm.  Cost is $15 for the workshops at my studio.  I am putting together kits so if you can't make any of the workshops stay tuned for more details on the kits.  Here's a look at the layouts created using the Dreamin Paper Pack:
this is without any journaling added yet and I put in a quick family picture we took this weekend but it was super sunny and windy so we all looked like we were in pain.  I put a watercoloring filter on the photo to help it somewhat.  Journaling can be added directly to the Colonial White side beside the photo.


This is layout #2.  I have either some journaling strips or a special cut journaling block using the Art Philosophy Cricut Cartridge.

Layout #3 and #4 will be for you to do on your own time.  You will have the paper and you can choose to create these layouts using the cutting directions and sketch you will be given or create your own design.


Stamps sets I used for my Cherish Family Scrapbook Layouts are:  Trinity Alphabet, Classmate alphabet, Vintage Type and Love Life Stamp Set. I used Chocolate ink for all the stamping and the Art Philosophy Cricut Cartridge for all my cut out embellishments.  I also utilized some banner dimensionals, brads and Colonial White ribbon. 

Friday, November 4, 2011

Holiday Wishes!


Place a minimum order of $25 in CTMH acrylic stamps* between now and November 30th and you'll be eligible to purchase this gorgeous seasonal stamp set "Holiday Wishes" for just $5 (retail value is $19.95!!)! You may buy one Holiday Wishes stamp set for every $25 in stamps that you purchase. As a creative bonus, many of the images in the stamp set coordinate with the shapes on the Cricut Art Philosophy cartridge for added cutting & stamping fun.


Place your order now and receive your new Holiday Wishes set just in time to make beautiful holiday cards to send to family and friends!

Thursday, November 3, 2011

Christmas Card Stamp Camp Approaching

The snow may be falling but it's time for a camp-out. Okay, it's a camp-in at Oasis Angel Studio. I have put together 10 fabulous Christmas cards that your friends and family will love. First Camp date is on Friday, November 18th from 7-10pm. $15 for 10 cards.  Bring some of your favorite Christmas cookies to share and I will brew up some hot apple cider and we will stamp out some cards. Second Camp date is on Sunday December 11th 1-4pm.  RSVP Here    Here's a sneak peak of one of the cards...

Tuesday, November 1, 2011

Organizing your photos

It's really no wonder why so many people put off doing anything with their photos. We take SO many of them these days with our digital cameras but they go into folders on our computer and many never be seen again. I took on the task of slowly but surely organizing my folders and re-naming them so I could find the photos when I was ready for them. I was showing a friend Studio J the other day and it became this daunting task trying to just locate a few photos so I could walk her through putting together a layout in Studio J. It really is a matter of organization so here are just a couple tips to get you started. Put all photos for one event in one folder and label them with the event name, month and year.  This will make finding your photos much easier. Now when you go into Studio J, you can upload all the photos in that folder for that event and you can click on them later to preview them larger so you can figure out which ones you want to use. We don't have to scrapbook them all. Just the good photos and no duplicates or similar photos, just enough to tell the story.
This is a darling Christmas stamp set that you can get for just $5 measily bucks when you purchase $25.
www.ctmh.com/janinerobertson

Thursday, October 27, 2011

Acrylic Block Tip #1

I have been having lots of fun with the alphabet stamp sets, Trinity and Classmate. Because My Acrylic Stamps stick on the block so well and because the blocks are clear, it's just too fun to put together your own sentiment for a card or title for a scrapbook page. I really love the fact that My Acrylic stamps can be super small and still stick to the block until you pull them off. So, play around with your alphabets and try this little trick when you are putting your own sentiments, titles and words together: Place the stamps one at a time from behind so that you are looking through the block seeing the word come together as it will look when you stamp it. I seemed to get it lined up easier doing it from behind rather than typically the block on the table way. Try it out and have some fun with your alphabets this week.

Wednesday, October 26, 2011

More Elemental Fun

I am using the same designs I used with the Sanoma Level 2 Paper Pack scrapbook pages I designed for an upcoming workshop. I fliped the top to the other side, used a couple of Milepost Shapes and A Little Thanks Stamp Set to finish it off. I love using the same design so you can see how easy it is to have a completely different scrapbook page each time. I have always designed my own pages from scratch and have occassionaly used designs I see in a magazine but with my time so limited these days due to working full-time I think I am going to get a copy of one of Close to My Heart's Foundational How-to Programs. I will start with Cherish since that's the word I used for my title in this layout. This will be good for those evenings when my brain is mush from a day of data entry work and I need some creating therapy.

Get Your Close to My Heart How to Program Here

Monday, October 24, 2011

Silent Auction for Halloween Carnival

Since I started putting together my scrapbook workshop designs for November/December workshops, I decided to donate a framed scrapbook page for the silent auction at the Halloween Carnival at my son's school. I created this page from the Elemental Level 2 Paper Pack, Classmate Alphabet, Art Philosophy Cartrige, Love Life Stamp Set, Olive ink and brads and a banner dimensional. I love the simplicity of it. I wasn't too sure about the Elemental paper but when it comes together it looks fantastic. Let me know if you agree!

Saturday, October 22, 2011

An Abundance of Opportunities Awaits

I have been reading a wonderful book by a friend of mine in my networking group called 10 Godly Keys to Success and Prosperity. I have been creating as I go through the book working my thoughts and feeling about what I am reading into my creations. I have done a couple layouts on Studio J and did my Dreamin Layout about my dreams and I created a pin to wear to remind me of a few things and be an object of curiosity that people will ask about. I chose the letter "A" for my pin because of the chapter about having an attitude of abundance. Meredith Bromfield is the author and she hit the nail on the head. Attitude is Everything! I have been wearing this pin for over a week now and have found that I have been in a much better frame of  mind. I am more positive, up-beat and just feeling AWESOME! I decided to create a new pin every month with a different letter to remind me about "whatever" and to get people asking and talking about it. It's kind of fun to watch people look at the pin but some of them will never ask you so I am super excited when someone does and I can share about my Awesome God and how he's given me an Abundance of blessings and provides me with an Abundance of Opportunites and I just have to keep the Attitude that Anything is possible with God. I hope you are having and Awesome weekend and enjoying the beauty of the fall season and that your attitude is looking up. Find out about Meredith's Book

Tuesday, October 18, 2011

Christmas is coming...

and so all my friends have started to wonder what am I going to give this Christmas. I don't want to spend an arm and a leg but want to do something special, unique, possibly made by me. Hmmmmmmm.  I know I will call Janine and ask her about doing a workshop so my friends and I can make a couple of scrapbook pages for the family photo.  Talked to Janine and she is going to create designs for 6 scrapbook pages for one paper pack from her new business Close to My Heart.  We get to do two of them at the workshop and get the instructions for creating the other 4.
This is going to be such a special gift and will look so nice in a frame on my mother-in-law's wall. And the best part I will have 2 completed scrapbook page gifts and 4 more to complete before Christmas for just $12. I can't wait to see what Janine has designed! She will even make kits for my friends that cannot come to my workshop for $20. This is too awesome!

Friday, October 14, 2011

Birthday Card on the Fly...

I have been getting the reminder message on my computer about my Dad's birthday coming up on the 23rd for over a week and kept snoozing it but woke up this morning and thought yeah, I better get to it. So, I called on the Cricut Art Philosophy to help me make a simple and fast birthday card for a male. I used the Celebration stamp set that is one of the 3 sets that comes with your Cricut Art Philosophy cartridge. I pulled out some coordinating paper from the Typeset Paper Pack, grabbed my Bamboo and Chocolate inks and got to cutting.


I made the mistake of cutting my green mat at 2.25" and knew it was too big when I pulled it out. Oh, duh, it should have been 1.75" to go with the 1.5" stamped image I was going to use. Okay, so sleeping last night on the chair wasn't the greatest thanks to my hubbie snoring up a storm. In any case, I thought to myself 'how can I make this work'. I used it and just trimmed off the edges. I used the words 'Fun, Love, Joy' from the Celebration stamp set and placed them all together randomly on a block to create my worded background. Stamped 'Best wishes to you' on the inside and all done in about 15 minutes. Yeah. Now it's time to get ready for work but I will be back playing with some new Close to My Heart stuff that came yesterday!

Tuesday, October 11, 2011

Snow Inspiration

This past Saturday we woke up to a blizzard, at least it seemed that way at our house. You can drive 1 mile south and it's not snow, it's rain. It makes living here interesting to say the least. But the snow kept me from getting out to do errands and in the studio to craft. I had just recevied the Wonderland Paper Pack from Close to My Heart and was just inspired to create using this wintery paper. I decided to try making another magnet card so that the recipient can take off the front piece and use as a fridge magnet. It's a card and a gift all in one.  I dropped it in the mail box on Monday to get it in for the World Card Making contest but discovered that the post office was closed on Monday. Great! They specifically said it has to be postmarked by Oct 10th but the darn post office wasn't open.  I will see about emailing them and ask that they consider counting my card towards the contest even though the post mark is going to say the 11th. I don't think they realized it was Columbus day either.


I did lots of embossing on this card including edging the papers in ink and applying sparkle embossing powder so I would have a sparkly edge. I found some pre-made silver bows that I had in my stash forever that worked perfectly. I will have only two of these available to make at the Project Playground on Oct 23rd so 2 lucky ladies will be able to come and make but if you really like this all you need is the Wonderland Paper Pack, I Believe Stamp Set, Blue ink, Sparkle embossing powder and some white card stock.  I would gladly give you the card recipe so you can make this wonderful winter card. www.ctmh.com/janinerobertson

Sunday, October 2, 2011

Creating keeps my mind off of...

my shoulder pain. I went to the doctor on Thursday for it and turns out I have a bone spur and the machine at the YMCA triggered a swelling in that area. So, doc hooks me up with a steriod shot which I had before when I hurt my other shoulder from our indoor sky diving adventure a couple of years ago. All seemed pretty good until I woke up Saturday morning with more pain in my arm and all over that area. It was a different kind of pain, a burning pain which was a big indication to me that I was having an allergic reaction. It could only be from the shot. So, my creating on Saturday was only a blessing in that it kept me focused not on the pain I was feeling but my oh my I was hurting bad. Thankfully, I got a good nights sleep and it seemed a bit better in the morning and with IB profin it has been much more tolerable today so I managed to get more accomplished today but I am not quite finished with todays project so I won't be posting it just yet but I wanted to share with you the scrapbook layout I made with the Typeset Paper Pack of my two kids school portraits from last year. I thought I better get them done now before we get to far along into this school year and the memories of last year start fading away. I love to outcome.  I always tell people if you aren't into scrapbooking at the very least make one page a year with your kids school portraits.  I will be putting all of theirs in a book all it's own so we can see how they have grown and changed from year to year. So another weekend bites the dust and off to my work week I go...

Friday, September 30, 2011

World Card Making Day is October 1st

I have been playing around some more and creating more card projects with my newest stamps and paper packs from Close to My Heart.  I am looking forward to crafting all day on Saturday and hope that some people will join me and keep me company. I love the fall season the most of all seasons because of the colors. There is something about oranges, golds, reds that just speak to me so much.  I have been having fun with the Dreamin paper pack which you can also find available as a paper kit on Studio J. Kits really do make putting together a scrapbook page so easy. No color coordinating to worry about! I created a two page layout with the Dreamin paper pack and used the Trinity alaphabet stamp set and the owl is from the Pair-a-Phrase September special double stamp set that I got free with my $75 order. It's not too late if you want to get one of these.  http://www.janinerobertson.myctmh.com/   Okay, time to get back to bed. Menapause is not fun but I have to get back to bed and get my beauty sleep.  I hope to get to Dreamin of some more creations I will make on Saturday.

Tuesday, September 20, 2011

What to do with a stamp set?

I am not use to having stamp sets that I didn't purposely pick out to buy for myself but with my kit came sets that I may not have bought by their initial looks but in playing around with them, I am finding that there are all kinds of possiblities with stamp sets and yes, even the ones you may not have selected for yourself. I made this card with the Elemental paper pack and Everyday Life stamp set included in my consultant kit. The possiblities are endless...

Saturday, September 17, 2011

Studio J from Close to My Heart is a Winner!

I have been having so much fun creating digital 2 page layouts with the Studio J on-line scrapbooking program from Close to My Heart. I finally got to pay day on Thursday and ordered prints of my layouts. Being a member to Studio J brings the price to just $6.50 for a 2 page layout or $3.25 a page.  I read in a scrapbooking magazine that the average scrapbook page costs about $7 to create. So, I am thrilled to have not only found a way to save money but a way to utilize what little time I have to create and really be able to get pages done. The ordering process was super simple and within 10 mintues I had an email with my directions on how to save the free Jpeg files I get with being a member. So, now it's time to show you what some of my creations on Studio J. 

Sunday, September 11, 2011

My Acrylic Stamps Advantages

I got really hooked on the cling mounted rubber stamps from The Angel Company that I have almost shunned the thought of using acrylic stamps. I had some from before I became an angel that have been sitting on the shelf collecting dust but with the arrival of my new kit and the new acrylic stamp sets that came with it I am finding some fun advantages to these marvelous acrylic stamps. First off the stamp placement can literally be exact because of the clear nature of it. The cling were pretty good for this but these have the ultimate advantage with the see through it aspect. The next advantage I have found is how darn small a stamp can be and usable. The cling mounted stamps always had more trouble clinging simply because the surface area was so small. These acrylic stamps stay on the block until you take them off! So, I had some fun playing with My Acrylic Stamps from Close to My Heart this weekend. These two will be available to make at Project Playground World Card Making Day Celebration on October 1st.  I hope you have it set on your calendar. I can hardly wait to spend a whole day with friends making cards!

Friday, September 9, 2011

The New Adventure Begins

I couldn't wait to get started with Close To My Heart so as I waited for my kit to arrive I have been playing in Studio J. I have found it to be so very easy and plenty of choices to make it your own and even add things to a layout. It is a very good start in digital scrapbooking and I find it especially cool that I have been able to play with it on my breaks and lunch at work! Classical scrapbooking will always be the foundation as I love the hands-on, etc but this digital stuff has made me a happy scrapper. I am getting layouts done quick! My kit arrived but I found my disorganized mess to be a challenge as I wasn't sure where yet to put everything so I could find it again. I have been tackling that issue before I get my hands on the stuff that came in my kit but I am hoping by this weekend to make enough headway that I will dive into some creative fun. I am working on getting to know everything I can about Studio J as I am doing my first Studio J gathering on Friday Sept 23rd and of course working on more card projects for World Card Making Day Celebration on Sunday October 1st. So, mark your calendars or contact me if you interested in learning more about Studio J.

Saturday, September 3, 2011

My New Adventure has Started!

It really was a very easy decision. I have fallen in love with the products that Close to My Heart offers and I am so falling in love with what already seems to be a fabulous company. My kit is on it's way and I can't wait to get going with it. It's so EXCITING!!! I have pulled out some stamps I bought years ago with Close to My Heart and have been having some fun playing with them. It's a bit different having the clear stamps but I am really starting to love these suckers. I

Sunday, August 28, 2011

A Door Closes but a Window Opens...

It was a week of shock and sadness when me and my fellow angels across the country got word that The Angel Company was closing. Sadly, the economy has taken it's toll on another victim, actually make that about 5000 of us. So, as many angels out there are doing, I, too am contemplating how to proceed. I love what I do and love sharing it with others so it just can't end but it was nice to have the umbrella of a company over me as I did my own creative business. I have managed to keep my business floating somewhat. It pays for my hobby is about what I would call it now. I have never set out to make bookoo bucks doing what I love.  I simply want to do it and will be grateful for whatever blessings come from it whether it be monetarily, relationships or my own personal growth. I am looking into a few direct-sale businesses and will let you know what I do decide. I am seriously being called now to devote my creative energies into starting a faithbooking ministry. It has been on my mind for quite some time but I have not had the kick in the behind I needed until now. I am going to start working on my faithbooking ministry concept and maybe by the first of the year be ready to launch it. Lots of research and crafting to do. I love it! So, stay tuned for what lies ahead at Oasis Angel Studio.

New Products and Tools Give Boost to Creativity!

I am a so guilty of spending way too much on anything to do with cards and scrapbooking. I admit it! I am addicted! But the plain truth is that new products, new tools, new techniques, new craft magazines arriving in the mail all give great boosts to my creativity. I started playing around with my templates I got at the Expo this past summer and am tickled by what I came up with. My friends at Project Playground last week, were wonderful in giving me their thoughts.  I got this awesome tree template and wanted to play around with it. Mind you, this is out of my realm of expertise. I was embarking on new territory using a template. I finally got some glitter and flock at Joann's so I was ready to give it a try like I had seen at the Expo. Well, my first tree, I just did with green flock. Cool but not good enough, So, friendly advise said go with fall colors and I could because I got a whole set of glitter and flock in lot of colors. So, I decided to use several colors of glitter and some flock to and was so totally BLOWN AWAY by how it came out. I just love it. Well, I had to improve upon it so I added some distressing ink from Tim Holtz but wasn't quite satisfied so I did the distressed background first with spritz of perfect pearls and started to add the tree. The paper was a little warped from the wetting and heat setting so my template did not want to lay flat but I gave it a go and thought, "let's see what happens". OH MY GOSH! It just got SO much more beautiful. That warpness in the paper allowed more of the paste to get through the template design that it made the tree look fuller. Well, I loved the final outcome but found it only really looked awesome in full light because the red background blended with the red in the tree too much so I did it all again with tea dye color distressed ink from Tim Holtz. Yeah! I think I finally got it the way I like it most but they all look good in their own way too. It's never boring trying new things that is for sure.  What are you wanting to try out in your crafting?

Wednesday, August 3, 2011

Inspiration from People

It was great to spend some time with friends on Sunday afternoon making cards at my recent Project Playground event. I am always looking for inspiration and it often amazes me the places I find it. This time I got my inspiration from my friends who were here on Sunday. One wanted to see a baby boy card at the Project Playground Replays on August 19th and 21st and another wanted a baby girl card so as I designed this card last evening and when I was finish with it I remembered this boy and girl request and thought I need to make this same card in a masculine scheme. So that is my new challenge in the days ahead. I will be designing a card and whether it be masculine or feminine, I will create another of the same design in the opposite sex.  Now, I have to get to creating the baby boy and baby girl cards...

Wednesday, July 20, 2011

New Inspiration is So Exciting!

I went to the Rubber Stamp and Scrapbook Expo this weekend. The first day I decided to pace myself and just look before buying. I took a beginners class for Copic markers. I did learn some things I did not know about that made a lot of sense and now I know how to use them to get the blending effect that looks so awesome. The class went through the lunch hour so I was so hungry but wanted to take something home and come back tomorrow. So, I bought a few stamps. LOL.  Okay, maybe not just a few but I tried. I got this floral stamp set with all kinds of realistic flower stamps and a word set with all kinds of scripture and good encouraging sayings. Because I bought enough stamps, I got to pick a grab bag of stamps for free. Well, when I got home and unloaded them. I was so pleasantly surprised by them all. I got two wild cat stamps, one with a tiger and another with a mountain lion. Because my daughter is so into wild cats, I was thrilled with these, especially so after taking the Copic marker class. I never would have purchased this kind of stamp before because I have avoided the whole coloring kind of stamps. I like to keep thing simple and easy but I pulled out my set of Copic markers I had bought a few months ago and new I had most of the colors I needed to do the tiger stamp and the mountion lion stamp. Oh My Gosh! I am so in love with Copic Markers! They came out fantastic!  I will have to post the photo of it later but just know that it is so much easier than you think! I can't wait to show you when you come to a future Project Playground.

Saturday, July 16, 2011

Never Under Estimate the Power of a Scrap!

Yesterday, on my lunch break at work, I took a look around the Spellbinders website to check into this new Presto Punch machine and looked in their gallery for ideas.  Well, I ended up getting a bad virus from the site onto my work computer and it is looking like they will have to re-build my computer. Great!? But the good news is I did get inspired to try the concept of using multiple spellbinders dies to create a card. So, this morning I looked at the dies that I currently have and saw a few scrap card stock pieces on the table and decided to use those and go from there.  I am very pleased with the results.  But as many of you may have already figured out I am not one to let scraps go to waste.  I looked at what was left over and ended up making three more cards of various designs utilizing what I had left. So the thought came to me that you really can Never Under Estimate the Power of a Scrap.  You may end up making your best card ever from scraps leftover from the last card you made! I have tried to organize my scraps but that is still a work in progress. I do have a left over envelope box I use for card sized scraps and another little basket for smaller scraps that could be used to create an photo corner or other embellishment piece. I also started a box of 1/2 paper strips because I like utilizing strips of paper in my designs for both cards and scrapbooks.  I have two over-flowing boxes full of larger scrap pieces that I need to get to and do something more with before they take over my whole studio. I have Major Mom coming to my house on Monday evening to do an evaluation. I heard them speak this week at my networking group and realized that maybe it was time to get some help before the clutter takes over everything. So, dig out some scraps today and see what you can come up with! You might be pleasantly surprised.

Friday, July 15, 2011

Drooling over the new stamp sets!

The new catty's arrived and I was tearing open the box to get to them. I am in love with so many of the new stamp sets. Now I will have to figure out which I really want to get like NOW! I am a word person and love having a large variety of word or saying stamps and am happy to see there are a lot of new sayings for me to add to my collection. I haven't much chance to play with the Copic markers that I got a couple of months ago but the Rubber Stamp and Scrapbook Expo is in town this weekend so I signed up for a Copic marker class so I can finally get a better idea of how to use these puppies! I really like that you can get them individually now! I ended up taking a day off work yesterday because I wasn't feeling that great and my daughter ended up with sunburn from her camp field trip the day before to a water park. Thankfully they had them wearing their camp shirts otherwise it would have been so much worse. My new Paper Creations magazine came in so I got some inspiration, felt a little better with Ibprofin and got down in my studio where it was much cooler and got to crafting.  I am so delighted with the outcome.  I made two cards based on designs in the new magazine and then I used the left over paper to and the same design concept to create two scrapbook pages. The cards will be available to make at the upcoming Project Playground on the 31st and the replays on August 19th and 21st. I wish I could craft all day everyday!!!

Tuesday, June 28, 2011

FEELING OUT OF THE LOOP BUT THE ANTICIPATION IS BUILDING

I have been getting emails from other angels on what the new catalog is like, what's in it, etc. I feel so bummed that I couldn't make it to seminar again this year. I really have to start putting aside a little cash each month so I can get out to Nebraska next year. It kind of sucks having to sit it out and wait for news and wait for your order of cataloges to arrive. I got my order in today so I am hoping by this time next week I will be drooling over the new catalog and all the new stamp sets. There is apparently a white pen that everyone is raving about as well. I will be super happy to be able to get a white pen that actually works! I wonder if our dry climate here has anything to do with it but I have to get a pen and use it within a few days and after that it just doesn't work well. So here is hoping... I had some free time tonight with both kids up at Uncle's home for the night so I finished putting together a fun card using scraps from my over-flowing scrap boxes and the outside frame of a die cut.  I tried a couple different dies and ended up really liking how the ice cream cone came out and thought that makes a great image for a summer card. I love the challenge of using my scraps in my scrap box. I picked out about 10 patterned paper scraps and cut them into 1/2" strips and put in the new strip scrap box.  This is really fun way to use those outside frames of the die cuts you cut out. Now, I have to come up with something to use all the die cut ice cream cones I have. I am sure I can figure something out. I will let you know what I come up with.

Monday, May 30, 2011

End of year school stuff has kept things busy...

but I have managed to get in some crafting time.  I did a page on Mother's Day and it came out gorgeous and I did a couple pages about my son's 8th grade continuation ceremony that just happened this week. Trying to get to those photos and memories before they fade away.  I have been utilizing any left over paper from card design projects and creating a scrapbook page using some of the same design concepts or techniques I used in the cards which is cool and makes putting the scrapbook page together pretty easy since I already have a design/concept to go with. I just got a book on success with your craft business. I wanted to see what else I could be doing.  I have to get my stuff up on my Zibbet store. I have a few items but I have to get some business cards made up and start marketing my site more. Always a work in progress...

Saturday, May 7, 2011

Back to Creating...

It was nice having a few days away from home in sunny warm CA with my mom and sister but I was blooming with some ideas.  Of course, my card magazine came in the mail, new paper is sitting around waiting for me to do something with it and it was a warm day today so being down in the studio was a nice place to be on a warm day. I started off with a sketch from a card magazine and just kept going and going.  I made two cards for the replay Project Playground coming up next weekend and a few more cards with the scraps and put together a beautiful scrapbook page.  I like to take all my left-overs and see what else I can come up with so I don't have to put too much into the already over-flowing scrap box. I am looking forward to The Angel Company order coming in any day now for more inspiration.  New stamps!!! Yeah! I can't resist a sale and you shouldn't either.  There's lots of stamps being discontinued and some of them have been favorites of mine for the last couple years.  Gotta go crawl into bed now and get some sleep.  Tomorrow will be a wonderful day! Happy Mother's Day to all the mothers in the world!

Wednesday, April 20, 2011

Got it!

Turned out to be a simple unplugged cable issue. Duh! My photography skills still need some work but this photo will do.

Golden Egg Challege

I have been surfing around the new website for The Angel Company and the blogs. I read about the Golden Egg Challenge and wrote down the criteria. Glitter, 3 layers, 3 colors, ribbon or floss and flower.  I ended up making a card last night and got all finished and was way happy with it and realized I forgot the flower part. Ugh. So, I had to modify it.  I am still very happy with the design and will have to copy it and try it with some other paper, colors, etc.  Of course, my camera and computer don't seem to want to communicate this morning so I can get the picture of the card up here but I will consult with my tech advisor hubby and see what's up with that and get it up as soon as possible. I have been scraplifting for a while and just using designs I see and trying them out and modifying them but this was refreshing to just go with the raw materials and go for it. I love the results and am sure you will too once you get a chance to see it. Ugh.

Monday, April 11, 2011

Work is play!

I have a Mother's Day Market I am going to have a table at on Tuesday evening and so I have been prepping cards to make and sell at this event.  I got a cute and simple idea from one of my magazines and went to play.  I used my new Create a Critter cartridge and an old one that I need to get out and look into further called Animal Kingdom.  A customer and friend of mine ordered some graduation, thinking of you, get well and sympathy cards for her business so I figured I would kill two birds with one stone. I changed up the card sketch a bit as I went along creating new cards.  I love this simple but effective design.  I will have a couple of these at the Project Playground coming up this Sunday April 17th.

Sunday, March 13, 2011

Create a Critter inspiration

Thanks to my good friend, Michelle, I was introduced to the cartridge for the Cricuit called Create a Critter. She helped me put together a farm page with some cows. I was so thrilled because I told my cousin I would make her a scrapbook of her baby's first couple of months and his room is all done up in a farm theme.  I got lucky last week and found some farm paper to use through Oriental Trading but the Cricuit cartridge is gold! I created my daughter's birthday invites last week using the stripes cat. It was so cute.  I didn't make enough to keep one so I will have to go back and make one more to include in the scrapbook for her birthday. So, I wanted to try making another card with a critter so I came up with this book mark card.  I made it for a mom or mom-to-be specifically but it could be used for anyone.  I cut a slit in the middle of my card and put the paper on top and bottom of the slit so it doesn't show.  I ended up sizing the book mark at 4 inches long so it wouldn't come out the bottom of the card but not come over the top either. I ended up putting a band of card stock on the inside to keep the book mark bottom down as a kind of anchor so the top part doesn't want lean forward as much. For a first attempt creation, I am pretty happy with it. I created a Mother's Day card using one of the easiest ever techniques out there. Not sure what you call the technique. I think it might be the overstamp technique where you stamp one image and than do some stamping of image without re-inking. I also added the kissing technique and got some words lifted off the butterfly with that technique. That is a very cool technique but you need more filled in stamps.  That's not the term for that but you will see what I mean by looking at the card. I threw together a Father's Day card with the kite stamp and some paper I got recently at Scrap for Less. All in all a productive afternoon.  I hope to do more today but I will be going with a friend to a parenting seminar at my church.  I need some new tools to deal with my very spirited almost 8 year old daughter! :)

Sunday, March 6, 2011

Playing with some new stamps and the Copic Markers

I got some new stamp sets recently that were featured last month on the savvy projects blog for TAC.  I love the concept of a designer each day and showing all kinds of ideas! I was inspired to say the least. I tried my copic marker out for the first time.  You will see in the Hedge Hog Happy Card that the red balloon got a bit too much ink.  It was dripping wet when I first opened it.  I did it on regular white card stock and soon was able to see why many angels commeted when we first got the Copic markers that you really want to use the "right" card stock.  I did pick up some of TAC premium white just in case and was glad I did. I did try coloring on the premium card stock and it looked SO much better. I love the Hedge Hog set which is a Level 2 hostess set that I got for free.  Nice! I also got the Cups filled with Love stamp set.  I don't think that is the name. I don't have the Fall catalog so I will have to go to TAC website and look up the name again so I can label my set appropriately. I tried coloring the tea cup with water color pencils but didn't really like the end result too much. I decided to go with easy and stamped the tea cup on my patterned paper I was going to use for the card and cut out the middle of the tea cup and pasted it over another stamped tea cup that I had used just a quick chalk coloring on.  I personally like to be able to get my coloring done quick!  I have never wanted to spend more than a 1/2 hour making just one card! Ugh. That's not me. So, this card ended up pretty nice and didn't take me TOO long. Time to play is limited these days so I have to keep it real!

Monday, February 28, 2011

The 5-2-1 is Back!

I created this 5-2-1 workshop back in 2009 and it was a hit.  I put it aside until now. I wanted to have something that would incorporate lots of cards and some other projects as well for my project playgrounds. So, I pulled out my old instructions and went line by line creating the projects. The first set of projects came out pretty well especially with some added flair like dry embossing and ribbons and brads.  The first time around I kept it super simple without the extras so that people could see you can make cards in a simplistic way and they can look great.  The second time going through the instructions and making the projects I made a few adjustments on measurments and added a picture stamp rather than just word stamps. My first thought in creating the 5-2-1 was to use up most all the paper given.  The project asks for 2 12x12 coordinating patterned papers. 2 12x12 coordinating colored cardstocks and 4 white or cream colored card stock. All of these papers need to work together for it to work. I used the Emma Soar with It collection which was nice because of the double-sided patterned paper it gave me a couple more options to change the look if desired. I played around with embossing and embellishments to give a general idea of the possibilities you can do to enhance the projects. So, I am going to add a slideshow at the top of the blog with all the projects so far created for the next Project Playground on April 17th including one of the flower pot cards I was so frustrated with last week. I did do another version with more lively spring colors and made it a Mother's day card.  I will have to add that into the slideshow at some point. I have to work on my daughter's birthday invites next. They are going to be wild!

Tuesday, February 22, 2011

Frustrating Challenge Conquered!

I saw this cute flower pot card in a magazine and have been trying to reproduce it. Well, I didn't have any flower stamps that were big enough so I decided to go with die cut flowers using my Cricut but after 3 attempts I was so frustrated. It just wasn't looking right. I finally figured it out. I needed the flower a little bigger and more than just 3. I will have to get my camera going in the next day or so and show you all my flower pot card creations. I am very happy with the last one and now know I can create more! yeah.

Saturday, February 12, 2011

Experimenting can be so much fun!

I have really enjoyed looking at the Savvy Projects Blog for TAC each day to see what the designer of the day has done. Lots of fun ideas. I also got some inspiration this week from the new Cardmaker magazine that I just started subscribing to. It was so awesome to see some familiar stamps and names from TAC in the magazine. The diagonal accordian card was interesting to make. Not always easy to make something without any dimensions to go by but just a photo but I like what I came up with. I think the middle part would be a great spot for a photo of maybe me and a friend together. I made up a couple for the Project Playground in April so some of my friends can try out this kind of card. I totally forgot about the downloadable from TAC so was very happy for the remind of those and created what I call the fold back card. Simple but elegant! This card will be wonderful for a birthday or wedding. My last recent experiment was inspired from the magazine. I really liked the idea of the kite. I am not happy with how the sky and clouds turned out but I have another idea or two that I will try out. Creating the kite was a challenge in itself. I had nothing on the Cricut nor in all my punches or die cuts to help me but finally found my large clear ruler with all kinds of diagonal lines on it and right smack in the middle was the kite shape I was looking for. Felt weird using a ruler and pencil to get the shape cut out that I wanted and then getting the patterned paper kite for the inside a little smaller. Wow that was challenging too but I somehow managed it. Going to work on that some more and see if there's an easier way? It's been fun experimenting this last week.

Wednesday, February 9, 2011

April Project Playground will be here before I know it!

I have been following the designer for a day on the Savvy Projects blog for TAC and got inspired this last weekend to try the retriform techniuqe from the recent blog hop. It's a fun technique. A little more labor intensive but with very nice results so it will be worth it to give it a try for a project for Project Playground. I made the thank you cards I just sent to those who came to the first PP in January with this technique. The other card I made was inspired by one of Michelle's designs ont he Savvy Projects blog. I just happend to have the tools to try this out. I was not really happy with it at first. I tried a fish stamp but that didn't pop enough so I went with a die cut of a sea horse from the Cricut and was very happy with that. You will get to make one of these in April if you wish. Here's to more creating!

Monday, January 17, 2011

January 30th 2001 Project Playground is Coming!

It's the start of a new year so it's time again to re-think goals, make some new ones and make them happen. Project Playgroud is one of my most fun and enjoyable parts of my business. I enjoy talking with the women who come and helping them with their creations. My inspiration for this Project Playground has been my goal to send a thinking of you card everyone day for a year. Okay, we are already two weeks into the new year and I have only sent out 5 cards. Preparation is really going to be the key to actually getting this accomplished. I am re-thinking this goal to be 2 cards a week for this year and we will see about preparing for the next year and making it 5 cards a week. I do have to be realistic, don't I? My other inspiration has been love with Valentines Day around the corner and my 15 year wedding anniversary and all I learned about love in 2010 I just have been really inspired with hearts and heartfelt sentiments. I hope you will be inspired by the creations I have designed for this Project Playground. Project Playground is on Jan 30th 1-5pm. You pay for whatever you make from my large assortmeent of designs. Email me at RobertsonOasisAngel@gmail.com for questions, to RSVP or ask about getting any the projects as a kit to do on your own time.

Matthew Sermon Series #1

Matthew Sermon Series #1
Faithbooking-Applying the Word to your Life